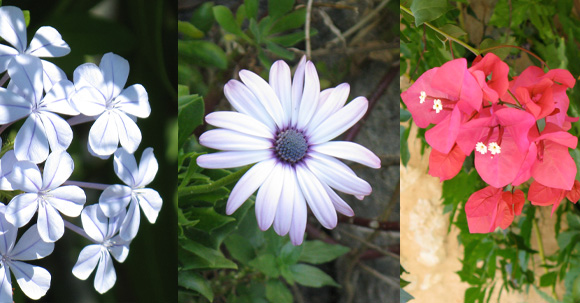
Hello. There’s been a little bit of a transition lately as I’ve moved to a new apartment and wow am I happy to be back in Osbourne Village. If you don’t have a car this is the best place to live in the entire city IMO. There are so many shops and I’m a five minute walk away from Safeway. On top of all of that my new bus to work takes 25 minutes and it’s an express. WUT! I’m almost entirely unpacked, but the most important part of the move (my computer :D ) is all setup and ready to go. I’ve wanted to do some kind of flower render for a long time and now I’m just getting one under way. I really like taking pictures of plants and flowers wherever I go and when I went to Nice a few years back I snapped a plethora of shots for inspiration. Here are a few thumbs.
 (http://www NULL.terrymatthes NULL.com/wp-content/uploads/2011/06/flowers NULL.jpg)
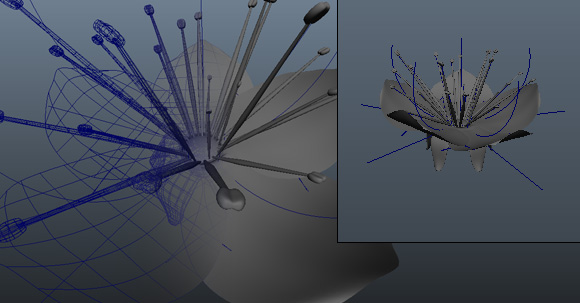
I’ve modeled the main flower so far, but I still have to do the branch and buds. My plan is to model one flower and hook the petals and filament up to non-linear Bend modifiers. The petals have one running vertical as well as horizontal. This way I can control the petals cup shape on the fly. After I model one complete flower I will group the objects that make up the flower and then apply “Duplicate-Special” to the group and check the “duplicate input graph” section of the option box. If you don’t do this the non linear modifiers will duplicate, but they won’t control the duplicated geometry. The next part of this project is to animate the flower growing. These bend modifiers will help me control the movement and shape of each element through the diffrent stages of growth. If you’ve never used modifiers before they are located in the Animation menu set under Animation < Create Deformers < Non-Linear < TypeX. Each modifier has unique controls that are dependant on the type of modifier. A “‘Bend” modifier has a curve attribute as well as standard controls to extend or lessen influence of the modifier. A modifier such as “Sine” will have attributes such as frequency, which you would expect from a wave based tool. All of the modifiers are curves who’s shape modify the geometry much like a lattice (http://caad NULL.arch NULL.ethz NULL.ch/info/maya/manual/UserGuide/CharSetup/DeformLattice NULL.fm3 NULL.html). In fact pairing these tools can give you some great control over your objects and their animation. The only drawback to this method seems to be the duplication.
The only way I can duplicate the geometry and keep the modifiers working is to make the duplicates instanced copies of the original flower group. An instanced copy of an object references the source object for all properties, essentially becoming a copy cat object. This means when you pull on one of the bend modifiers it will control the same part of each instanced flower in the exact same way. I’d like to sprinkle some randomization into this, but I’m not sure how to at this point. Posted below are a few in progress shots of the flower with some of the non-linear modifiers applied. Like always if you have any questions post a comment and I will do my best to answer it :)
 (http://www NULL.terrymatthes NULL.com/wp-content/uploads/2011/06/flower_rough NULL.jpg)
, nixin (http://nixinstudio NULL.ca/blog) /
Maybe this isn’t the best solution but if you put the geometry + the modifier into a group and then duplicated them several time and then positioned them to bend in the proper direction; you could then try setting up a set driven key to drive the deformation values all at once from one place. You could do this by setting all the deformers values to be driven by the value of one deformer which would be the driver or maybe you can set something up in the channel box similar to how facial animation is often set up.
, Terry (http://www NULL.delightning NULL.com) /
I’ll look into set driven keys. I’ve never used them before. I was also thinking of using a runtime expression on the value of the curve that would randomize it. Each filament would also have their own modifiers (about 30 total). The bend modifiers on the filaments would again have a runtime expression that added randomness to their unique modifier’s curvature value. This would mean that each filament would have a single random value that had overall control of the bend and then that would be multiplied by the random value affecting the unique bend modifier of each filament. Everything would be uniquely random.
I’m pretty much right back where I started though because each flower still looks the same, it’s just all exactly similar random values for each filament bend on each copy of the flower. There must be some way you can create copies of a piece of geometry affected by a modifier and not have to reference the original modifiers values without breaking their attachment to the duplicated geometry; right?
, nixin (http://nixinstudio NULL.ca/blog) /
Okay I’m and idiot I don’t know why I thought putting the deformer into a group would change anything. This is the sound of me failing -> http://www.youtube.com/watch?v=1ytCEuuW2_A (http://www NULL.youtube NULL.com/watch?v=1ytCEuuW2_A)
, Terry (http://www NULL.delightning NULL.com) /
I figured out I was doing two things wrong. The first: in the “Duplicate Special” menu you have to choose “Copy” as your “Geometry type” not “Instance”. Second: you have to check the “Duplicate input graph” box not “Duplicate input connections”.