« Posts tagged bend

[Game] Game Trees WIP

Evegreen Trees Work In Progress

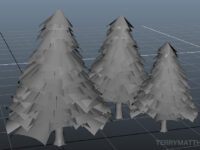
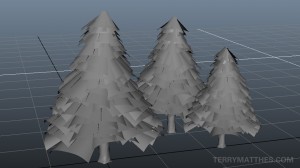
Evegreen Trees Work In Progress (http://www NULL.terrymatthes NULL.com/wp-content/uploads/2012/12/trees1 NULL.jpg)I’ve been watching people model trees all at work over the past few days and it’s driving me crazy. I must make a tree! So in keeping with my current project I’m going to sculpt an evergreen tree in the with snow on it for import into the Unreal Development Kit. The first thing I wanted to get done was the base mesh. I with the Speed Tree program that comes with the UDK. You can’t export from here but it does create the geometry in a pretty efficient way. After tooling around with settings for about an hour I was able to get a look I liked. Next I needed to recreate the same style of geometry in Maya. To get things started I began with the trunk. The trunk is pretty straight forward. It’s just a cylinder extruded along an ever-so crooked EP Curve. The next thing to do was create the branches. To save time you can model one branch and use Duplicate Special(Edit > Duplicate Special) to space a bunch of them along the +Y axis. This will not work properly unless your branch is pointing outwards from the center of your trunk with its pivot point also at that center of the trunk.

Use the Distance Tool (Create > Measurement Tool > Distance Tool) to get the  height of your tree. Divide your height by how many branches you want. Add that value to the Translate Y Offset. And don’t forget to also offset the Y rotation so the branches don’t space out in a straight row. Record (write down) your offset values as you’ll be using the same values to duplicate and space your “Fronds” or leaf cards. Your cards can be as simple or as complex as you want. Since I am just using this mesh as a guide in Zbrush I will keep my cards simple. I used a Bend Deformer ([Animation]Create Deformer > Non Linear > Bend) to curve a plane with 5 divisions in the height and only one in depth. I then tapered the sheet by selecting all the vertices at the end and scaling them together. You could stop modeling here and start texturing, but I want the poly count a lot lower. A Single tree as it stands is around 5000 vertices and unless you’re in a cinematic situation where you can control the poly count that’s just way to high for a tree. I think by taking this into Zbrush we can achieve a similar look at no more than 25% of the vertices. As added punishment I’m also going to push myself to use poly paint on this sculpt X_X

Terry
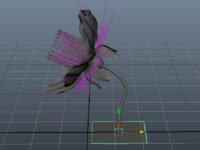
Flower Stem Rig

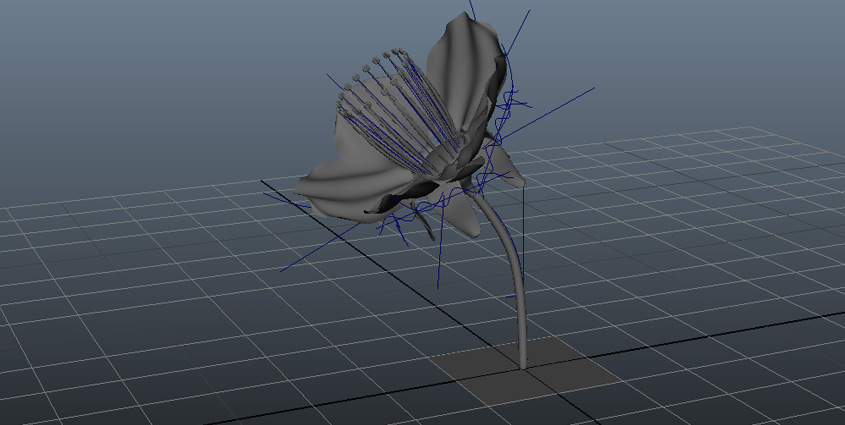
flower bent by dynamic hair deformation

I had problems. I talked to people. I now have less problems. This is generally how I like my troubleshooting to go. The last problem I had with my project was getting the animation deformers at the top of the flower to follow the stem when I bent it. In newer versions of Maya (2011+) there is a constraint type “point on poly”. This worked quite well. I grouped the flower head along with all its deformers and then parented that group to the top center vertex of the stem’s poly cylinder. One problem down, about a dozen more to go. I don’t mind running into walls, not being able to climb them is a different story :P

grouped Deformers following vertex modified geometry (http://www NULL.terrymatthes NULL.com/wp-content/uploads/2011/07/stembend NULL.jpg)

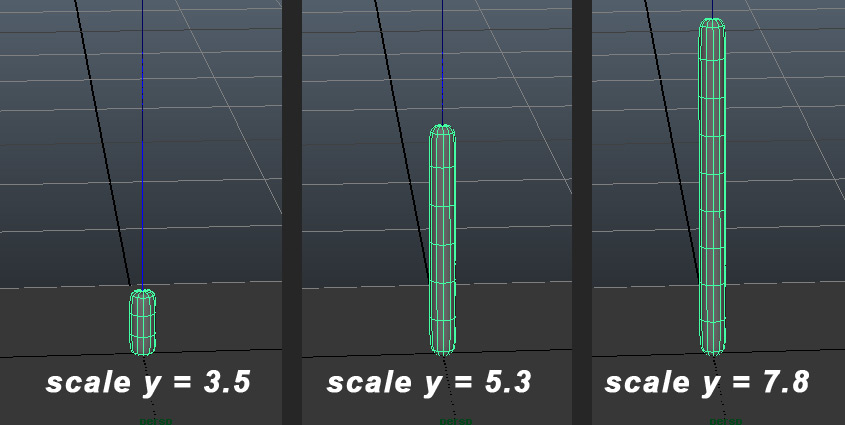
My next challenge was getting the stem to grow and take the flower head with it. There was a few different ways I could have approached this. While figuring this problem out I had to keep in mind that the stem might be bending and curving while growing. At first I thought I could just increase the scale of the stem, but as the stem got bigger and the bend modifier curve grew larger the mesh started to lose shape because it’s resolution was too low. A quick Google search came up with a video (http://vimeo NULL.com/7420996) on how to rig a vine by Jordan Blit. In this video Jordan hooks up a simple connection between the vine’s “Y scale” and a “poly split ring” node’s “divisions” attribute. This seems to be a terrific way to grow the stem and maintain its shape no matter the length. There are a few other things Jordan sets up to make this error-proof and you should definitely check it out. I should mention that your construction history must be kept intact for this to work. If you clear your history the connection to the “poly split ring” node will be broken. When finished I added a constant variable via Mathematic Nodes Mental Ray (http://www NULL.creativecrash NULL.com/maya/downloads/scripts-plugins/rendering/other-renderers/c/mathematic-nodes-mentalray-support---2) plugin that multiplies the divisions by 2. This gives us a higher resolution mesh. Terrific :D Our stem now grows and deforms to our bend modifier, plus we’ve given ourselves a “hook” to grab via our math constant to increase our mesh resolution. Now I need to set up our stem so it can be affected by dynamic forces.

flower stem's "y scale" relationship with the poly split ring" node (http://www NULL.terrymatthes NULL.com/wp-content/uploads/2011/07/stemscale NULL.jpg)

A friend and fellow 3D student mentioned rigging the stem up with a skeleton and using IK handles. He pointed me to this video (http://vimeo NULL.com/6044700) by Alex Villabon. In this video Alex gives a grass mesh a simple joint chain and then uses a Maya hair to deform the skeleton, which indirectly animates the mesh. I liked this method, but I didn’t want to use any joints in my flower rig. Keeping the rig “light” was important given the possible amount of flowers in my scene. Instead of controlling the stem indirectly with a joint chain I decided to make the hair directly control the stem by making the hair a “wire deformer’. A wire deformer is a curve which shapes the geometry it’s parented to. You can alter your curve and watch the geometry conform to its shape. This works out well because the hair is inherently affected by dynamics and it will control the shape of our stem. Now that the stem is set up correctly I have to start on the animation for the flower head. It has to transition from a bud into a fully bloomed flower.

flower bent by dynamic hair deformation (http://www NULL.terrymatthes NULL.com/wp-content/uploads/2011/07/flowerhair NULL.jpg)

At this point I still don’t know whether I want to use blend shapes or modifiers to animate the bud opening. I’m thinking blend shapes might be overkill as the bud is really just a sphere with 5 sections that peel back to let the flowers petals grow out. What do you guys think? In case anyone is interested I have started a thread (http://forums NULL.cgsociety NULL.org/showthread NULL.php?f=88&t=989384) regarding this project over at CG Society (http://www NULL.cgsociety NULL.org/).

Here are links to the videos and plug-ins I mentioned throughout the post.

Alex Villabon
Animate Joints With Maya Hair (http://vimeo NULL.com/6044700)

Jordan Blit
Growing Vine Rig (http://vimeo NULL.com/7420996)

Creative Crash
Mathematic Nodes Mental Ray (http://www NULL.creativecrash NULL.com/maya/downloads/scripts-plugins/rendering/other-renderers/c/mathematic-nodes-mentalray-support---2)

Flower Update

Flower with bend modifier applied

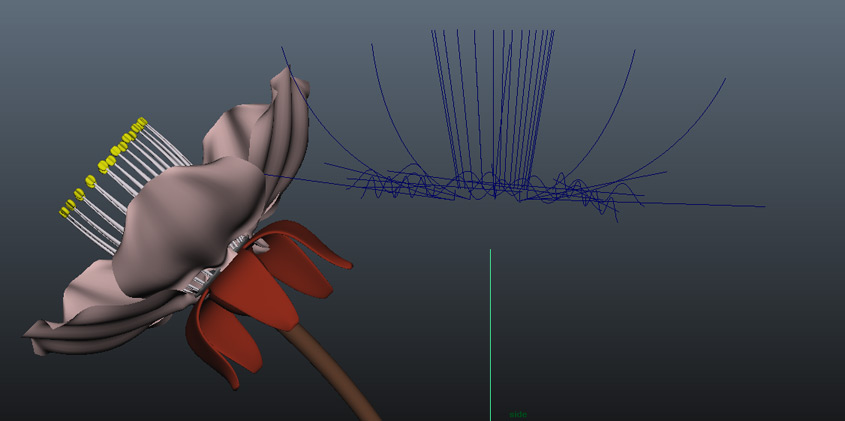
So everything was going as expected. All was well in the land of flowers and Maya… well almost. I’ve run into a snag when it comes to bending the flower. My non-linear bend modifier controlling the stem don’t seem to be moving the rest of the modifiers associated with the petals and filaments. Only the geometry of the petals and filaments is moved. I have tried all sorts of different parenting and grouping methods. Nothing seems to make the modifiers move. I think that when moving objects with modifiers Maya doesn’t register the geometry moving in the same was as if you translated it. Since the translate is not updated the parenting structures seem to be of no use. The modifiers just say in place. Quite frustrating if you ask me.

I’m looking into parenting the modifiers to a vertex or face. I quickly came across this plugin: DJ Rivet (http://www NULL.djx NULL.com NULL.au/blog/2006/11/11/djrivetmel/). DJ Rivet creates a hair follicle and parents the follicle to a geometry face. It then parents your object to the hair follicle. This plugin looks to be exactly what I need, but I am having 2 problems with it. One; it doesn’t want to install properly for me. When I got to load the plugin it doesn’t show up in Maya 2011. I have placed it in the bin/plugins directory where all the other plugins are, but it doesn’t show up in the plugin list in Maya. Two; it has been said by a few people that this tool doesn’t parent well to geometry that is being deformed :(

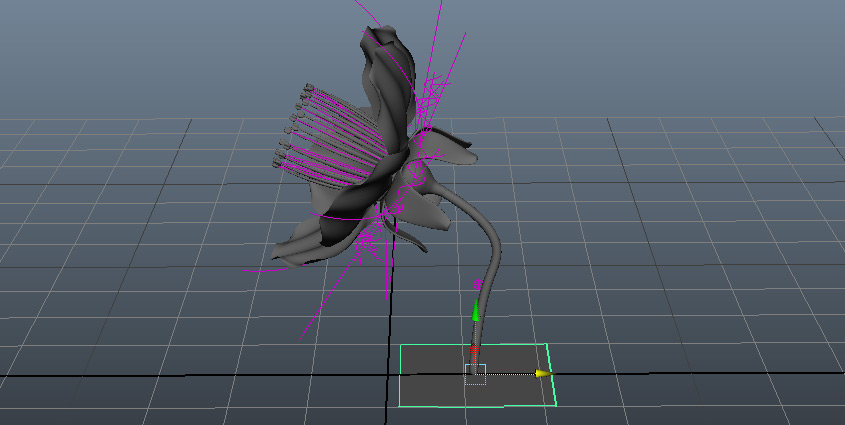
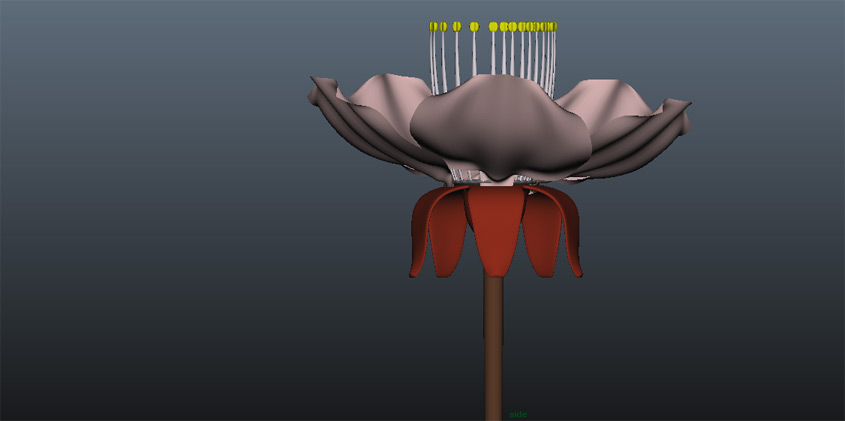
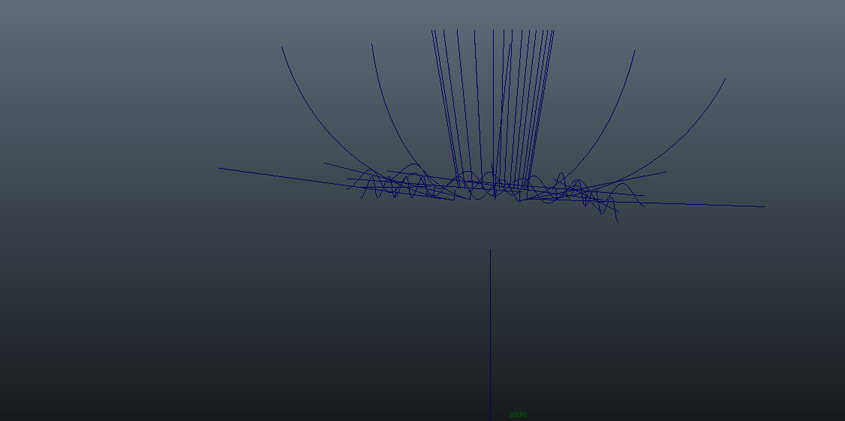
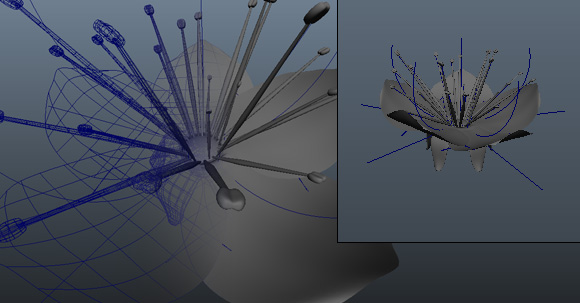
I might have to write a custom script for this. I’ve never done that before and it’s actually a little daunting. I figure I can track the position of a face on the stem by averaging the world position of the 4 verts surrounding that face. I can then grab that faces normal orientation and use it to set the rotation of the grouped deformers. As long as the face referenced is one from the top cap of the stem cylinder I’m thinking this should work. Consequently if anyone knows a far easier way, or a script that’s already been developed please let me know. To better visualize the problem here are three pictures showing the static flower, the bend flower and the deformers themselves.

Flower unbent (http://www NULL.terrymatthes NULL.com/wp-content/uploads/2011/06/flower_static NULL.jpg)


Flower deformers (http://www NULL.terrymatthes NULL.com/wp-content/uploads/2011/06/flower_deformer NULL.jpg)


Flower with bend modifier applied (http://www NULL.terrymatthes NULL.com/wp-content/uploads/2011/06/flower_bend NULL.jpg)


I think now is a good time to take a break from the rigging side of things and concentrate on the materials. I always like to switch gears when I become frustrated with a project. This way I can keep making progress without deterring myself from continuing on. For now I think I will just model a branch and manually place the flowers along it. When that is done I will get back to setting up the modifiers properly.

As always any comments, critiques or recipes for the best summer cocktails are appreciated :D

Flower Power

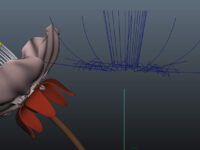
Flower geometry with non-linear bend modifiers

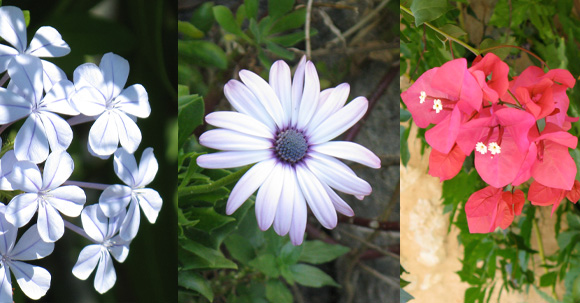
Hello. There’s been a little bit of a transition lately as I’ve moved to a new apartment and wow am I happy to be back in Osbourne Village. If you don’t have a car this is the best place to live in the entire city IMO. There are so many shops and I’m a five minute walk away from Safeway. On top of all of that my new bus to work takes 25 minutes and it’s an express. WUT! I’m almost entirely unpacked, but the most important part of the move (my computer :D ) is all setup and ready to go. I’ve wanted to do some kind of flower render for a long time and now I’m just getting one under way. I really like taking pictures of plants and flowers wherever I go and when I went to Nice a few years back I snapped a plethora of shots for inspiration. Here are a few thumbs.

Flower thumbs (http://www NULL.terrymatthes NULL.com/wp-content/uploads/2011/06/flowers NULL.jpg)

I’ve modeled the main flower so far, but I still have to do the branch and buds. My plan is to model one flower and hook the petals and filament up to non-linear Bend modifiers. The petals have one running vertical as well as horizontal. This way I can control the petals cup shape on the fly. After I model one complete flower I will group the objects that make up the flower and then apply “Duplicate-Special” to the group and check the “duplicate input graph” section of the option box. If you don’t do this the non linear modifiers will duplicate, but they won’t control the duplicated geometry. The next part of this project is to animate the flower growing. These bend modifiers will help me control the movement and shape of each element through the diffrent stages of growth. If you’ve never used modifiers before they are located in the Animation menu set under Animation < Create Deformers < Non-Linear < TypeX. Each modifier has unique controls that are dependant on the type of modifier. A “‘Bend” modifier has a curve attribute as well as standard controls to extend or lessen influence of the modifier. A modifier such as “Sine” will have attributes such as frequency, which you would expect from a wave based tool. All of the modifiers are curves who’s shape modify the geometry much like a lattice (http://caad NULL.arch NULL.ethz NULL.ch/info/maya/manual/UserGuide/CharSetup/DeformLattice NULL.fm3 NULL.html). In fact pairing these tools can give you some great control over your objects and their animation. The only drawback to this method seems to be the duplication.

The only way I can duplicate the geometry and keep the modifiers working is to make the duplicates instanced copies of the original flower group. An instanced copy of an object references the source object for all properties, essentially becoming a copy cat object. This means when you pull on one of the bend modifiers it will control the same part of each instanced flower in the exact same way. I’d like to sprinkle some randomization into this, but I’m not sure how to at this point. Posted below are a few in progress shots of the flower with some of the non-linear modifiers applied. Like always if you have any questions post a comment and I will do my best to answer it :)

Flower geometry with non-linear bend modifiers (http://www NULL.terrymatthes NULL.com/wp-content/uploads/2011/06/flower_rough NULL.jpg)