« Posts tagged fur

Maya Fur Tips

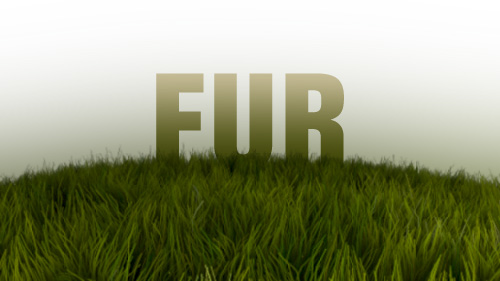
Fur as grass

Fur as grass (http://www NULL.terrymatthes NULL.com/wp-content/uploads/2013/04/furpic NULL.jpg)
Hey dudes, and dudettes. Here’s a few tips on dealing with Maya fur as it can be a little hairy… get it?! Seriously though, Maya fur can be confusing and a little tricky to work with, so if you don’t have cash to blow on some fancy plugin here are a few tips to help you guys out.

A) Triangulate your fur surface! Fur seems to like triangles. If you notice you’re getting odd bald spots this can be the reason.

B) UVs are KING. Maya fur is heavily dependent on the face distribution of your model’s UVs. Tiny faces on your UV sheet are going to have really really low fur density. More often than not you have to create a second set of UVs for fur to operate on. This is OK though as the fur menu lets you choose which UV set to base your fur on. To access this menu go to Windows > Relationship Editors > UV Linking > Fur/UV. Make sure you are giving an even face distribution on your new UV set.

C) You will NOT see textured colour in your fur even after hooking up the proper tip and base colour maps until you hit the “Bake” button at the top of the fur description. Anytime you add a new maps in you’re going to want to bake as well.

D) Fur colour is very sensitive. The maps plugged into your fur descriptions colour slots should be crushed down quite low. For the fur above my “Color Gain” values in the file node’s “Color Balance” roll out were set as follows: Base Color=0.130 Tip Color=0.310 Base Ambient Color and Tip Ambient Color =0.230

E) If you fur shadows aren’t showing up you will have to increase you “shadow density” in the fur description under the Mental Ray roll out.

F) Work in a linear fashion aka Linear Workflow (http://vimeo NULL.com/8119194).

That’s all for now. May the fur be with you!
Apartment Render Update + Maya Fur

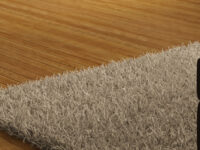
Detailed Portion of the Full Resolution Render

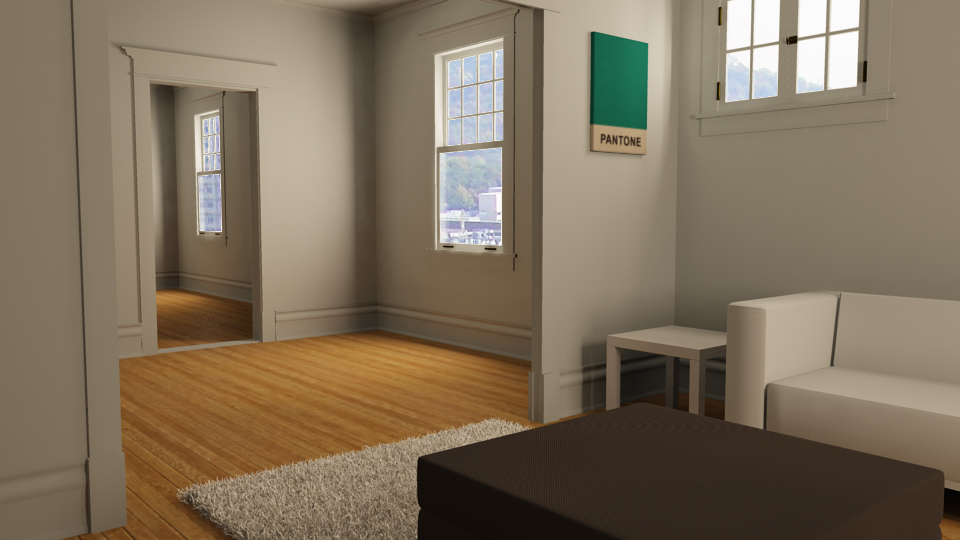
I’m just about 70% done my apartment render so I thought I would post an update. This is a to scale model of my old apartment. I had some previous renders, but the scale was off (really off) and it was causing all my lightning to be blown out. After Fixing the scale I noticed I was getting black renders even though Global Illumination and Final Gather were working properly. The issue was that my portal light’s intensity wasn’t near strong enough. I had to jack it up to about 2 billion! Crazy. I eventually toned it down to 1 billion, but anything under that and the light really dies off quickly.

As far as assets go I have modeled a sofa table and television which don’t appear in this render, but they will be in the next one. I think I’m also going to take out the couch for now because I just ordered one of the best leather sofas (http://fineleatherfurniture NULL.com/leather-furniture-blog/blog-list/513-the-best-leather-furniture-manufacturers-quality-not-quantity) to replace it, and I don’t have the space needed or time to give the old couch model the love it needs.
The shag carpet was really fun to work on. I’ve never used the Fur System in Maya before, but after the Introduction To Maya Fur (http://www NULL.digitaltutors NULL.com/11/training NULL.php?cid=42&pid=264) on Digital Tutors (http://www NULL.digitaltutors NULL.com) I really was excited to give it a try. I used carpet texture on a plane and told the fur system to grab its base and tip colours from that. going forward I think I might make the base and tip of the fur a little thicker. Other options were played with such as “scraggle”, “poll”, and “inclination”. It’s worth noting that under the Fur Feedback Description node there is a section called “Details”. Under this section you can add randomness to all the attributes. If you’re interested in all of the different fur properties there is a good textual resource over at http://caad.arch.ethz.ch/info/maya/manual/MayaFur/UserGuide/2CreatingFur.fm.html#176880 (http://caad NULL.arch NULL.ethz NULL.ch/info/maya/manual/MayaFur/UserGuide/2CreatingFur NULL.fm NULL.html#176880)

When it came to picking a backdrop I just grabbed something off of Google image search for the time being. I quickly used the layer properties of the render in Photoshop to drop out the windows as they were solid white. For the final shot I think I’ll climb my old fire escaped and snap a shot with my Wife’s camera. She has a nice Cannon 40D. I don’t plan on using HDRI for image based lightning just yet, but maybe I will set myself up so I can experiment with that another time :)

One thing I did notice in the render was the aliasing lines in the ottoman’s fabric. The lines stayed there when I raised the anti-aliasing to adaptive sampling set @ 64 samples. They went away when I tested that area with 256 adaptive samples.

At any rate here is the shot and if you have any question just ask in the comments or fire me an email. I’m around computers all the time so I respond fairly quickly to questions. I’m going to have this done in the next couple days so expect a finished post soon. I will also include depth of field in the final render. Above the full scene render is a detail render of the scene at full scale.
Detailed Portion of the Full Resolution Render (http://www NULL.terrymatthes NULL.com/wp-content/uploads/2011/05/detail NULL.jpg)

.

Apartment Render Test 02 (http://www NULL.terrymatthes NULL.com/wp-content/uploads/2011/05/apartmenttest2 NULL.jpg)