« Posts tagged grass

[R&D] Maya Wine Cart – Modeling Progress

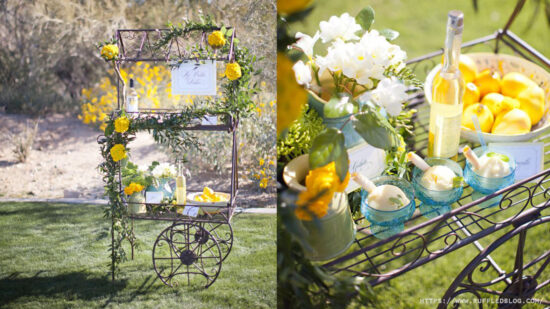
I’ve started a new piece to ring in the new year and with it comes some fun stuff to learn. I was searching for a nice scene to model when I came across a shot (bottom of post) on Pinterest courtesy of https://ruffledblog.com/ (https://ruffledblog NULL.com/). Below are shots of the first modeling pass. When putting a scene together I like to follow the order of: model, light, texture, render. I’ve roughed in several of the models so far and have one of the two types of flowers complete. Everything in the scene is pretty straight forward with the flowers and vines taking up the bulk of the time. The filigred steel around the cart was done by drawing out CV curves and then extruding a nurbs circle along their path. After the extrusion is complete I convert the nurbs tube to a polygon and then model a cap on each end.
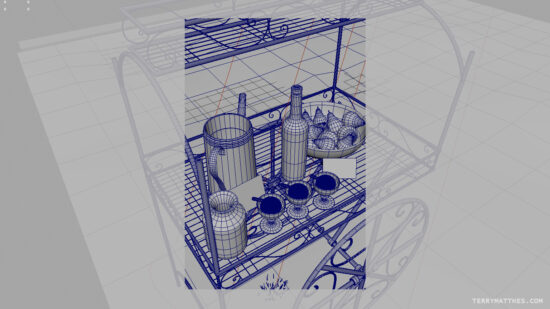
WineCartModelShotA (http://www NULL.terrymatthes NULL.com/wp-content/uploads/2018/01/WineCartModelShotA NULL.jpg)

The icecream was an interesting surface to try and capture. I ended up stumbling on a technique by Andre Caputo (https://www NULL.youtube NULL.com/watch?v=5hqBqzncVdw&t=48s) on Youtube for Modo. There is nothing special about the tools used to achieve the final goal so I was able to copy the technique in ZBrush. I’m not entirely happy with my results on the first pass so I will do another when time permits.
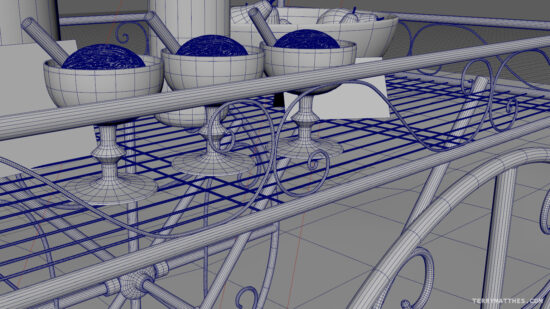
WineCartModelShotD (http://www NULL.terrymatthes NULL.com/wp-content/uploads/2018/01/WineCartModelShotD NULL.jpg)

The scene I chose has grass covering the ground and I’ve honestly never scattered objects in Maya. To achieve the scattering of the grass across the shot I used Maya’s system MASH (https://knowledge NULL.autodesk NULL.com/support/maya/learn-explore/caas/CloudHelp/cloudhelp/2016/ENU/Maya/files/GUID-5F45C398-D87D-424E-9F00-51D9FAB5A40B-htm NULL.html). I was really impressed by how fast and easy it was to get things up and running. I modeled a single patch of grass and then wrote some simple expressions in MASH to vary the size and positioning. I know as soon as a lot of you read “expression” you freak out and think “this is beyond me”. It’s not! A friend of mine pointed me to a simple primer and within 30 minutes I had things up and running. If you want the full rundown of MASH (of course you do) check out this tutorial (https://www NULL.youtube NULL.com/watch?v=6a7303eCTHI). It’s long, but thorough. For my purposes the grass I created should be a little lower poly, but as a first pass it will do.
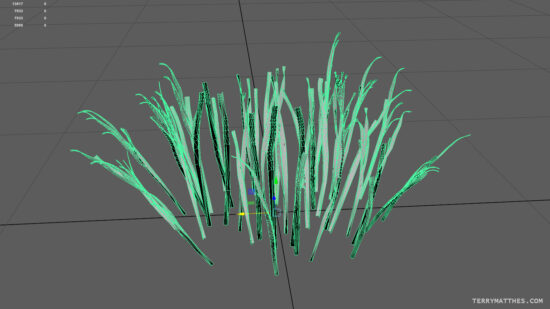
WineCartModelShotC (http://www NULL.terrymatthes NULL.com/wp-content/uploads/2018/01/WineCartModelShotC NULL.jpg)

I always like modeling objects from nature as I find the process both creative and freeing. When modeling mechanical objects you can really get hung up on your reference. I find this isn’t the case with a lot of organic assets. The flowers in the scene are Freesia (https://en NULL.wikipedia NULL.org/wiki/Freesia). There is also a yellow flower which I have yet to identify. I’ve modeled four different variations of the Freesia and that should be more than enough. My next step is to place them in the scene. As far as the stems go I’m going to wait until I have the placement of the flowers finalized then I will create the stems. This way I can have a single stem run up to several flowers. If I was to do this in reverse I would have to remodel the stems every time I changed the placement of the flower heads.
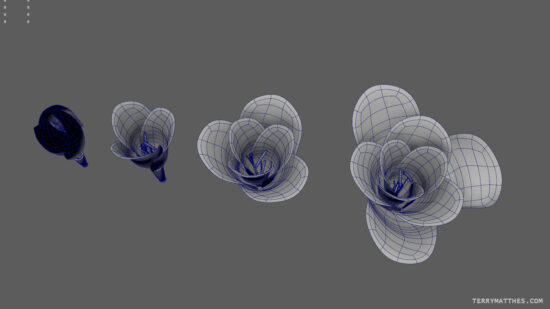
WineCartModelShotB (http://www NULL.terrymatthes NULL.com/wp-content/uploads/2018/01/WineCartModelShotB NULL.jpg)

The end goal of this project is just to be a still shot, I’m not planning any animation. If I was to add any it would be a simple camera push. I’ve got a VRay sun node lighting the scene which is a nice change due to its simplicity. My last scene was indoors and had many many lights of varying temperatures and types. Below are two of the shots I found on https://ruffledblog.com/ (https://ruffledblog NULL.com/) that I’m basing the scene on. I’m about two thirds of the way done the modeling and when I finish I will make a follow up post. As always if you have any questions don’t be afraid to ask as I love to help others when I can :)
WineCartModelShotE (http://www NULL.terrymatthes NULL.com/wp-content/uploads/2018/01/WineCartModelShotE NULL.jpg)
Graveyard Shot Final

Windy Graves UDK

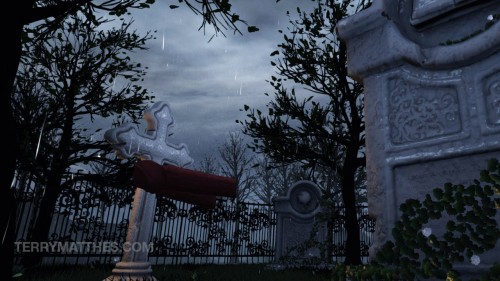
I’ve finished the UDK graveyard scene I was working on and started another :) This scene was fun to work on and it gave me a better understanding of the Unreal Engine as a whole. The most interesting part of the entire process was learning the UDK lighting system and how it handles (or doesn’t) BDRF in materials. For my next project I’m starting with a physically based shader that should make more sense coming from Maya. Putting together all the wind related meshes also taught me how far you can push cloth objects with simple skeletons and there will be more of that in my next piece.


Graveyard Scene WIP 1

Scene Snippet

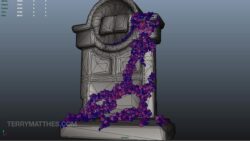
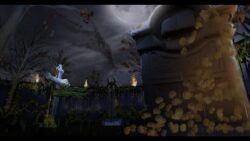
Just before I left for Montreal I was able to snap some pics of my graveyard scene. I’ve got most of the modeling done, as well as the sky and rain systems. The Ivy on the foreground grave still needs to be skin weighted for wind movement, whereas the Ivy on the background grave is using a vertex offset to animate the ivy.

Scene Snippet (http://www NULL.terrymatthes NULL.com/wp-content/uploads/2013/06/SceneSnippet NULL.jpg)

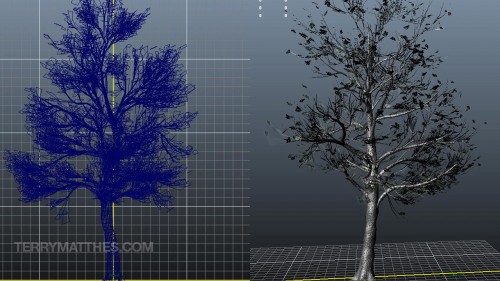
I’m quite happy with the look of my high detail tree, but I still have to tweak the leaf cards a little as some of them don’t line up with the branches I’ve painted on the branch cards. Speaking of vertex weights the trees also need this. I’m going to use the same material wind network the grass uses so they move together. Painting up the trunk and branches in Zbrush was fun and eventually I saved out a surface noise setting for the bark so that I could apply the same look across the entire tree without having to sculpt each notch in the bark. This setting can also be loaded up for any other trees I might create to help things look consistent from tree to tree.

High Detail Tree for UDK (http://www NULL.terrymatthes NULL.com/wp-content/uploads/2013/06/mayaTree NULL.jpg)

Sky Material Network (http://www NULL.terrymatthes NULL.com/wp-content/uploads/2013/06/skysetup NULL.jpg)Vertex Ivy Material Network (http://www NULL.terrymatthes NULL.com/wp-content/uploads/2013/06/ivySetup NULL.jpg)Vertex Coloured Ivy (http://www NULL.terrymatthes NULL.com/wp-content/uploads/2013/06/vertexIvy NULL.jpg)Graveyard WIP paintover (http://www NULL.terrymatthes NULL.com/wp-content/uploads/2013/06/paintover NULL.jpg)The material networks are purposefully obscured as they aren’t final and I wouldn’t want anyone to follow them as they are not yet complete. When I’m done I’ll post a better breakdown of the these. I’ve also included a quick Maya shot of the foreground tomb’s ivy and it’s vertex weighting. The base of the leaves are black to keep them from shifting and the weight falls off to red towards the edges of the leaves. You don’t have to be too meticulous with the weights as you can manipulate them in the UDK treating them just like any other RGB value.

After all is said and done I think I’m the most excited about implementing torches on the fence in the background. I apologize for the crushed levels in the video. When I get back to Winnipeg I’ll re-compress it with adjusted settings. If you visit my Youtube (http://www NULL.youtube NULL.com/user/DelightningVFX/videos) channel you’ll see the pyre tests (http://www NULL.youtube NULL.com/watch?v=w2k-J_Bhme4) I’ve made in the past and I’m going to turn these into “flipbook textures” (video game GIFs) to be used in conjunction with particles to make a really believable torch. I’ll post more towards the end of next week.


Wish me luck fellas, I’m really happy with how everything is coming together and I can’t wait to show everyone the scene when it’s complete.

Maya Fur Tips

Fur as grass

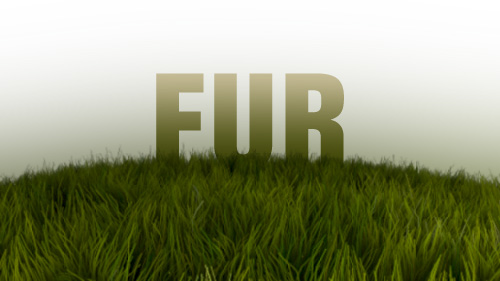
Fur as grass (http://www NULL.terrymatthes NULL.com/wp-content/uploads/2013/04/furpic NULL.jpg)
Hey dudes, and dudettes. Here’s a few tips on dealing with Maya fur as it can be a little hairy… get it?! Seriously though, Maya fur can be confusing and a little tricky to work with, so if you don’t have cash to blow on some fancy plugin here are a few tips to help you guys out.

A) Triangulate your fur surface! Fur seems to like triangles. If you notice you’re getting odd bald spots this can be the reason.

B) UVs are KING. Maya fur is heavily dependent on the face distribution of your model’s UVs. Tiny faces on your UV sheet are going to have really really low fur density. More often than not you have to create a second set of UVs for fur to operate on. This is OK though as the fur menu lets you choose which UV set to base your fur on. To access this menu go to Windows > Relationship Editors > UV Linking > Fur/UV. Make sure you are giving an even face distribution on your new UV set.

C) You will NOT see textured colour in your fur even after hooking up the proper tip and base colour maps until you hit the “Bake” button at the top of the fur description. Anytime you add a new maps in you’re going to want to bake as well.

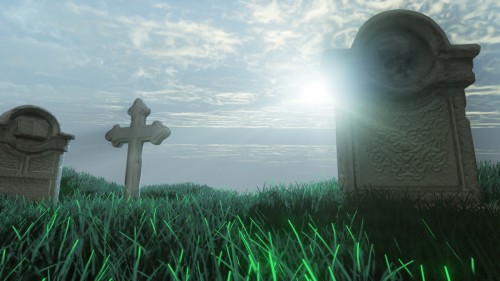
D) Fur colour is very sensitive. The maps plugged into your fur descriptions colour slots should be crushed down quite low. For the fur above my “Color Gain” values in the file node’s “Color Balance” roll out were set as follows: Base Color=0.130 Tip Color=0.310 Base Ambient Color and Tip Ambient Color =0.230

E) If you fur shadows aren’t showing up you will have to increase you “shadow density” in the fur description under the Mental Ray roll out.

F) Work in a linear fashion aka Linear Workflow (http://vimeo NULL.com/8119194).

That’s all for now. May the fur be with you!

[Game] UDK Windy Grass

Windy Grassy Plain

Windy Grassy Plain (http://www NULL.terrymatthes NULL.com/wp-content/uploads/2013/03/windyplain NULL.jpg)Making grass move in the UDK isn’t overly complex but it does requite a decent handle on Maya and the Unreal Development Kit’s material editor. The concept at it’s core is to use the Material Property “world offset position” to make your grass wave. Control of the grass is split between three different systems: the “wind directional actor”, the material network we create for the grass, and our grass mesh’s vertex colours.

Maya

Our verdant journey starts here. I’m not going to go over modeling a grass plane, but if you have any trouble you can just take a look at the one I made here to see the relative complexity of the mesh.

Maya Grass Plain Mesh (http://www NULL.terrymatthes NULL.com/wp-content/uploads/2013/03/grassmesh NULL.jpg)

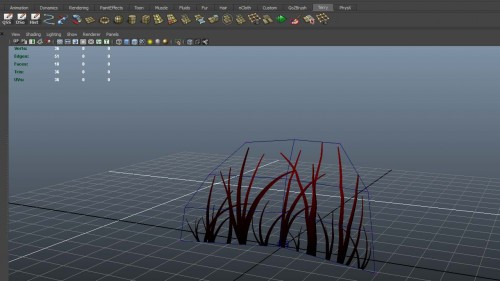
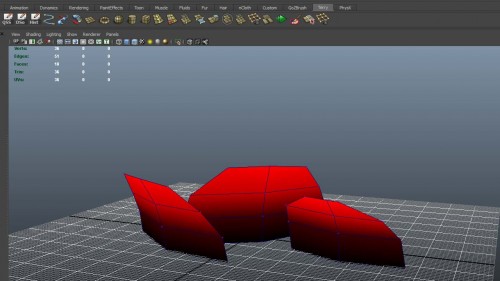
After you have created your planar mesh you’re going to need to jump into painting “vertex colours”. Vertex colours are literally just RGB values you’re painting on your mesh’s vertices through Maya’s vertex painting system. Before you go all nuts painting up your mesh you’re going to have to change a few of Maya’s options to ensure that vertex colours will appear properly in your viewport. The steps for enabling vertex painting can be found on Autodesk’s help site here (http://download NULL.autodesk NULL.com/us/maya/2010help/index NULL.html?url=Coloring_polygons_Make_vertex_colors_visible NULL.htm,topicNumber=d0e213327). After you get vertex colours working you can move on to the next step which is painting (http://download NULL.autodesk NULL.com/us/maya/2010help/index NULL.html?url=Coloring_polygons_Assign_colors_to_polygon_vertices_by_painting NULL.htm,topicNumber=d0e213575) a red gradient from the bottom of your mesh to the top. Lower red values will cause the vertex to be less affected by wind. Below I’ve placed a couple more grass planes along with the original.

 Vertex Painted Grass Meshes (http://www NULL.terrymatthes NULL.com/wp-content/uploads/2013/03/vertexColors NULL.jpg)

After your painting is complete you are ready to export your mesh for the UDK. You don’t have to do anything special on export in Maya to carry your vertex colours into the UDK just export your grass plain as a standard FBX.

Unreal Development Kit

Our mesh is done and it has all the properties it needs to accept directions from the “world offset position” in the material node we’re going to create. The first thing to do is start a new map and import your materials and models for your grass. After everything is imported create a new material.

In this material up with whatever diffuse, normal, and specular etc. that you need and then clear a fair amount of space in your material editor because node network we are going to create for wind is going to take up a bit of space.

Before we create the windy section of the material I wanted to break down the core of the wind network. I mentioned earlier we are using the “world offset position” attribute in our material  to animate the grass. As you can imagine, feeding the world offset position a constant value would yield no animation. We need some way to animate the actual value we are sending to the world offset position.

To accomplish this we are going to use two nodes. The “Sine” node and the “Time” node. The time node will give us the changing value we need. Plugged into the sine node we can create a continually oscillating value between 0 and 1. This is the same principal I used to animate optical flares in my previous post (http://www NULL.terrymatthes NULL.com/unreal-2/materials/sprite-channel-controller/).

Next we need a way of incorporating the red values of our vertices to control the wind falloff on our grass mesh.

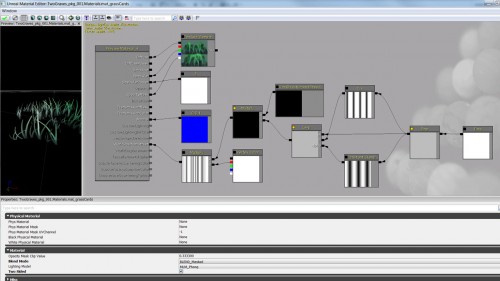
The wind instructions to affect the grass are going to come from a “Wind Direction” actor. Your going to need to put on in your scene and they are located in the classes hierarchy tab. When you bring up it’s properties you’ll see that there are a few different controls that we can use to affect the wind. Be sure to play around with these so you can get a good idea of how you’ve weighted your vertices after the network is complete. Beyond the diffue map, there isn’t anything in the network that you can’t grab directly from the right click menu in the material editor. Go ahead an copy the network below, then assign it to your mesh.UDK Windy Grass Material Network (http://www NULL.terrymatthes NULL.com/wp-content/uploads/2013/03/windyGrassNetwork NULL.jpg)

After updating your material network you should see the grass now waving at a constant rate in the wind. After this it’s up to you to discover some more interesting ways to make your grass move. Also take a minute or two and think about all the implications of this technique. There are a lot of things in video games you could apply this type of procedural animation to.

Conclusion

If you have more than one mesh that will use wind you should really look at setting up your material so it can be used for instancing. This material network can get large and loading it in for each plant is going to cause you some performance loss.

I hope this gave you a good understanding of wind principles and showed you a new way to spice up your Unreal Development Kit environments.

If you’re stuck on a particular step or want to know more about creating material instances ask away and I’ll do by best to help :)