After digging into the 2DPlatformerStarterKit (http://udn NULL.epicgames NULL.com/Three/DevelopmentKitGemsPlatformerStarterKit NULL.html) I began thinking about how I should go about creating my 2D test level. This level would be a staging ground for all sorts of pre-production tests. Things like lightning, particle systems, and mesh design would all be roughed out here. I always find if hard to visualize what sizes my meshes should be while working in Maya. I was thinking that a quick way to rough out the size of a level and it’s meshes would be to use pre sized blocks like LEGO (http://www NULL.terrymatthes NULL.com/wp-content/uploads/2011/08/legos NULL.jpg).
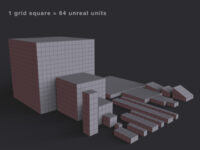
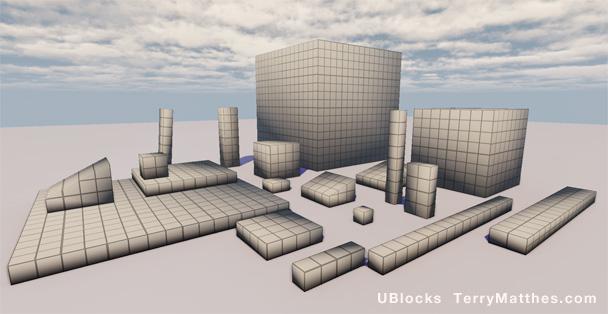
I’ve made several different sizes of cube type meshes that area all using the same parent material. Each square on the grid texture represents 64 units in the Unreal engine. If your Maya grid isn’t setup to work with the UDK change your grid settings to match these values…
Maya to UDK Grid Settings – Length and Width:2000 Grid Lines Every:64 Subdivisions:8
 (http://www NULL.terrymatthes NULL.com/wp-content/uploads/2011/08/ublocksweb NULL.jpg)
UBlocks in default UDK Scene
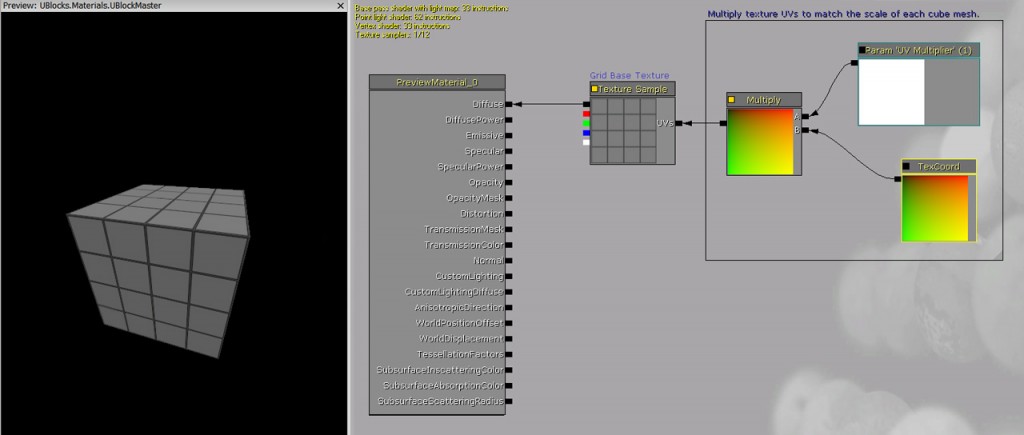
The material network is pretty self explanatory, but I’ll go over it quick. There is a texture coordinate node that is being multiplied my a custom parameter node. This lets you control the parameter node’s value separately in all instances of this material. The “U” and “V” coordinates in the “Texture Coordinate” node are represented in the texture by red and green. Multiplying this node’s output will multiply each color channel in the texture. Increasing the value of red and green will tile the material. The new multiplied red and green values are then plugged into the grid texture’s UV input.
 (http://www NULL.terrymatthes NULL.com/wp-content/uploads/2011/08/ublocks_mat NULL.jpg)
Shader network for UBlock parent material
Download UBlocks (http://www NULL.terrymatthes NULL.com/public/UBlocks NULL.zip) – I don’t mind if you redistribute the meshes with your projects, but please link this post or include the original ZIP file in your download.