« Posts tagged Maya

[R&D] V-Ray Brasserie

witteveen center


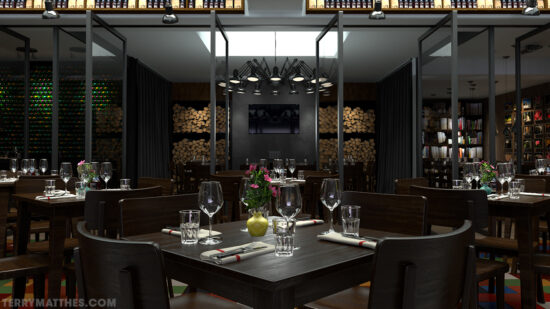
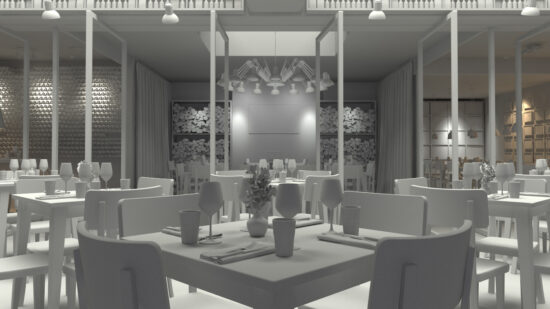
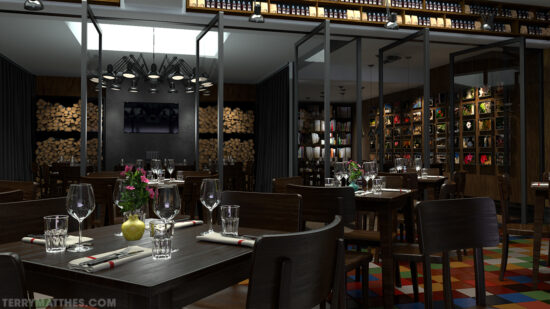
GISettings (http://www NULL.terrymatthes NULL.com/wp-content/uploads/2017/05/GISettings NULL.jpg)primarySettings (http://www NULL.terrymatthes NULL.com/wp-content/uploads/2017/05/primarySettings NULL.jpg)I took some time over the last few months to rework a scene I had modeled last year. I’ve redone all the lighting and materials in Vray as opposed to Mental Ray. A big part of this project was crushing render times down while retaining quality in the right places.  I’m in the process of rendering an animation of the environment. There is a lot of glass so if the settings aren’t balanced right between the aliasing and reflection/refraction quality the animation will “shimmer” where the glass in moving. The animation is 5 seconds at 30FPS or 150 frames. This means that even at the current render times of ~90 minutes a frame the animation would take 225 hours. I knew this would be a challenge, but what better way to practice using the diagnostic tools? The longer render times are actually acceptable given these are the minimum settings to avoid shimmering in the glass. If this needed to be done sooner I would ship this off to an online farm or ask some of my friends to render a portion of the frames for me.
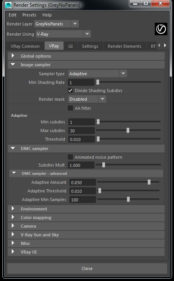
I’ve baked out all of the GI so that I can start and stop the render when my PC has some spare time. If I didn’t bake out the GI I would get changes in the grain when starting and stopping the render sessions. I’ve chosen to go with Light cache as my primary bounce solver while Irradiance mapping will be solving all of the secondary bounces. In this post I’ve included 2 shots of my render settings. One for GI and the other for primary rays/Secondary (DMC rays). I tried to include all pertinent information in the shots. If you can’t see the setting it was left at default.
 witteveen center (http://www NULL.terrymatthes NULL.com/wp-content/uploads/2017/05/witteveenNB NULL.jpg)


Some of the materials were made in Substance Designer, while other’s were built right in Maya. One thing in the future I would like to experiment with is instancing. There is a lot of duplicate geometry between the logs and the wine bottles, the cutlery could be considered another culprit. The books and nic nacs on the back shelf are all HDRI shots of a bookshelf inside my living room. Next I created masks for each group of books. To keep things simple I created several 4K texture atlases for the bookshelf items and the pictures. I then merged all the picture geometry together. If I wanted to put a different picture in the frame I would simply move the UV cords of the corresponding faces over a new area of the atlas.
 

witteveenVrayGray (http://www NULL.terrymatthes NULL.com/wp-content/uploads/2017/05/witteveenVrayGray NULL.jpg)


The render settings in the attached images worked for me. I give them as a guide, but each project is specific and your settings will probably have to change to suit the exact needs of your scene. The primary rays are kept as low as can be. These are the heavy lifters we want talking care of edge cleanup (anti-aliasing). Pushing this too high will cleanup up your edges, but it will also force needlessly high samples on areas of your scene that don’t need it. Keep this as low as possible. The DMC (advanced) settings are way way higher. This is where you’re going to see a lot of difference in the clarity of the surfaces. Remember the primary rays are really only there to alias all your edges, not to cleanup your image. We want the secondary bounces to clarify the fine details in the materials. A great explanation of this technique can be found over at Akin Bilgic’s blog (http://www NULL.cggallery NULL.com/tutorials/vray_optimization/).

Before I begin the render I have to create all my material ID masks. I’ll take these into Nuke on my Mac mini with some stills and start the colour corrections in post. When the render is done I’ll apply the same node chain to the animation and then bake that all out as a MP4. I’ll post the animation and colour corrected stills when I finish them and link them to this post.

Good luck and if you have any questions don’t be afraid to reach out or comment in the post below. I’ll admit the comment section is a little ugly, but I haven’t had time to adjust the CSS styles on it since changing formats. One day… one day I’ll have time for everything :) Right? :(
 

witteveenNC (http://www NULL.terrymatthes NULL.com/wp-content/uploads/2017/05/witteveenNC NULL.jpg)

[R&D] RenderMan Still Life

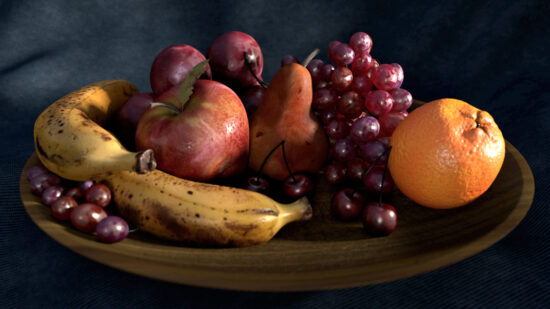
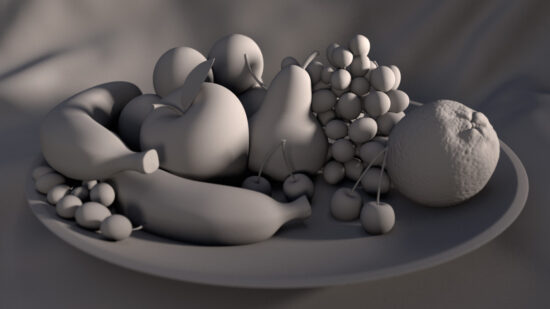
CG Fruit Bowl

CGChallengeOne (http://www NULL.terrymatthes NULL.com/wp-content/uploads/2018/08/CGChallengeOne NULL.jpg)
The models for everything in the scene were taken from 3DRender.com as part of their Lighting Challenge #1. I wanted to visit this challenge once more as a test of the free Renderman render plugin for Maya. The challenge is that you are given the 3D models to work with and your job is to texture, light and render the scene. Choice of lens and camera position are left up to the individual. I thought the plugin was fairly easy to work with and had a decent realtime render mode via CPU.

Workflow

  • Clean the geometry
  • Layout the UVs in Maya
  • Import UV’ed objects into Zbrush
  • ZBrush/Spotlight and photo references to paint fruit
  • Stage in Maya
  • Surface and light with Renderman

Photography

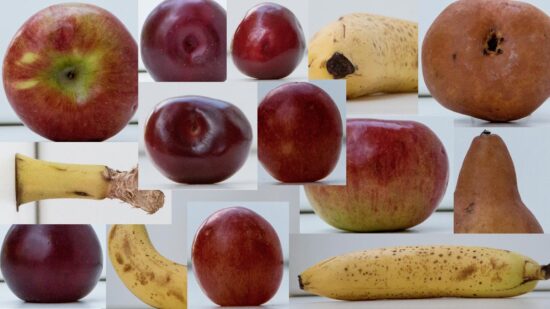
The photographs were taken in a lightbox using a camera mounted above it facing downwards.
I constructed the light box from white posterboard. The box itself was facing with the open side upwards. Then the camera straddled the box and the camera was underneath the tripod to shoot straight down. These are some samples of the raw shots

I later brought shots like these into Photoshop to remove an strong lighting info. I had one small setback when I was editing the photos. They had more grain than I anticipated, and it made it a little more difficult to fix some of the lighting info. Overall I was really happy with the results.
Fruit Collage (http://www NULL.terrymatthes NULL.com/wp-content/uploads/2018/09/fruitcollage NULL.jpg)

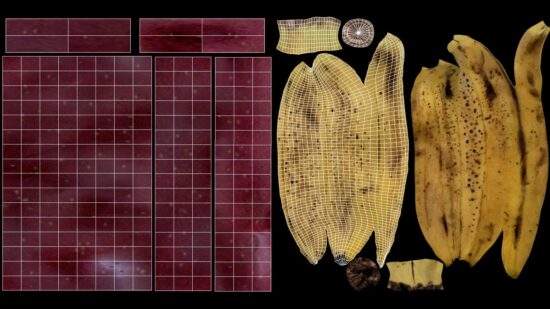
UV Work

The majority of the shapes are spherical in nature, so the UVs followed and were produced with spherical projections. I did want to try something different on the banana though. I cut the bananas along their natural edges and then squished them out of the peel. After the peel was flattened I snapped a shot. Later on in Maya I formed the UVs around the image. The bananas turned out great and I feel this was a big part of why.
fruituvs (http://www NULL.terrymatthes NULL.com/wp-content/uploads/2018/09/fruituvs NULL.jpg)

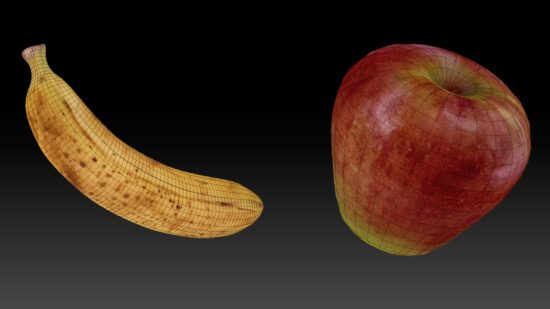
ZBrush / Spotlight

ZBrush is always fun to work in. I think that’s one of the programs big wins. Before Substance Painter came along it was a great way (and still is) to get your assets textured. Being able to resample areas of textures to stamp using Spotlight feels awesome. It lets you mix and match details from several different photos with ease. Painting your objects in 3D is such a liberating feeling when compared to painting in 2D.
fruitZbrush (http://www NULL.terrymatthes NULL.com/wp-content/uploads/2018/09/fruitZbrush NULL.jpg)

Lighting / Surfacing

There are two spotlights in the scene the key light is on the far right. It’s pushing through a large light blocker with a windows shape punched out. The fill light coming from the left of the photos is doing it’s job of pulling the shadows up so they appear softer. The surfacing of the fruit was easier to do in Renderman than previous render plugins. I found that the ability to control the second specular lobe made a huge difference. Although it isn’t necessarily physically correct that doesn’t matter in this instance. The interactive rendering you can do with even just your CPU for Renderman is pretty good. The one thing that really superised me with Renderman was the render settings you have to play with. Compared to Vray, or really any other render plugin out there it’s fantastic. There are a few confusing things like the colour you get when using Sub Surface Shading, but it is explained in the online documentation.
lightingFruit (http://www NULL.terrymatthes NULL.com/wp-content/uploads/2018/09/lightingFruit NULL.jpg)

Conclusion

Overall I would recommend RenderMan to anyone who wants to free their artistic mind and get away from being bogged down with technical details.

[R&D] Maya Wine Cart – Modeling Progress

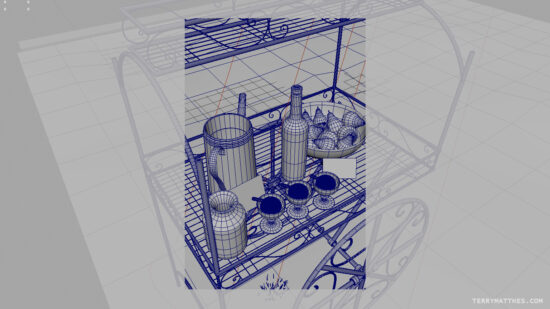
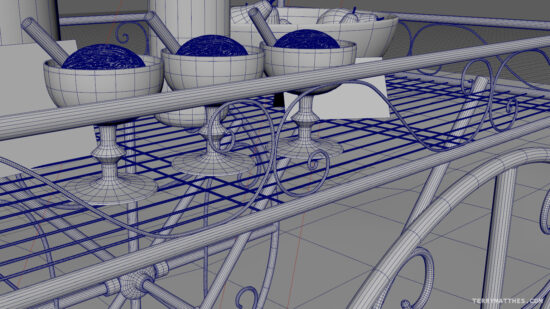
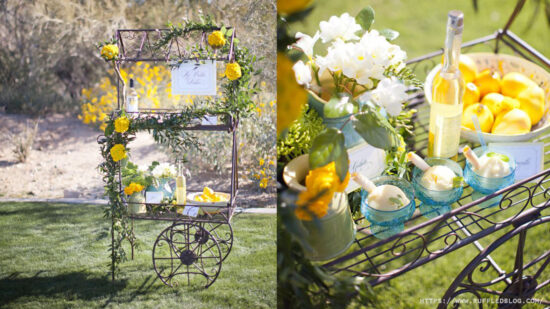
I’ve started a new piece to ring in the new year and with it comes some fun stuff to learn. I was searching for a nice scene to model when I came across a shot (bottom of post) on Pinterest courtesy of https://ruffledblog.com/ (https://ruffledblog NULL.com/). Below are shots of the first modeling pass. When putting a scene together I like to follow the order of: model, light, texture, render. I’ve roughed in several of the models so far and have one of the two types of flowers complete. Everything in the scene is pretty straight forward with the flowers and vines taking up the bulk of the time. The filigred steel around the cart was done by drawing out CV curves and then extruding a nurbs circle along their path. After the extrusion is complete I convert the nurbs tube to a polygon and then model a cap on each end.
WineCartModelShotA (http://www NULL.terrymatthes NULL.com/wp-content/uploads/2018/01/WineCartModelShotA NULL.jpg)

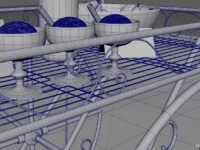
The icecream was an interesting surface to try and capture. I ended up stumbling on a technique by Andre Caputo (https://www NULL.youtube NULL.com/watch?v=5hqBqzncVdw&t=48s) on Youtube for Modo. There is nothing special about the tools used to achieve the final goal so I was able to copy the technique in ZBrush. I’m not entirely happy with my results on the first pass so I will do another when time permits.
WineCartModelShotD (http://www NULL.terrymatthes NULL.com/wp-content/uploads/2018/01/WineCartModelShotD NULL.jpg)

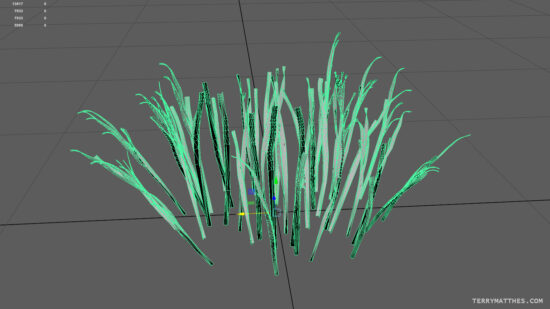
The scene I chose has grass covering the ground and I’ve honestly never scattered objects in Maya. To achieve the scattering of the grass across the shot I used Maya’s system MASH (https://knowledge NULL.autodesk NULL.com/support/maya/learn-explore/caas/CloudHelp/cloudhelp/2016/ENU/Maya/files/GUID-5F45C398-D87D-424E-9F00-51D9FAB5A40B-htm NULL.html). I was really impressed by how fast and easy it was to get things up and running. I modeled a single patch of grass and then wrote some simple expressions in MASH to vary the size and positioning. I know as soon as a lot of you read “expression” you freak out and think “this is beyond me”. It’s not! A friend of mine pointed me to a simple primer and within 30 minutes I had things up and running. If you want the full rundown of MASH (of course you do) check out this tutorial (https://www NULL.youtube NULL.com/watch?v=6a7303eCTHI). It’s long, but thorough. For my purposes the grass I created should be a little lower poly, but as a first pass it will do.
WineCartModelShotC (http://www NULL.terrymatthes NULL.com/wp-content/uploads/2018/01/WineCartModelShotC NULL.jpg)

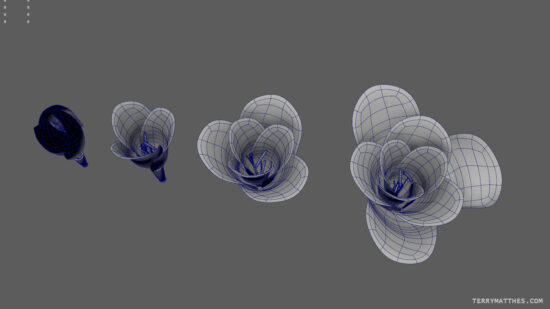
I always like modeling objects from nature as I find the process both creative and freeing. When modeling mechanical objects you can really get hung up on your reference. I find this isn’t the case with a lot of organic assets. The flowers in the scene are Freesia (https://en NULL.wikipedia NULL.org/wiki/Freesia). There is also a yellow flower which I have yet to identify. I’ve modeled four different variations of the Freesia and that should be more than enough. My next step is to place them in the scene. As far as the stems go I’m going to wait until I have the placement of the flowers finalized then I will create the stems. This way I can have a single stem run up to several flowers. If I was to do this in reverse I would have to remodel the stems every time I changed the placement of the flower heads.
WineCartModelShotB (http://www NULL.terrymatthes NULL.com/wp-content/uploads/2018/01/WineCartModelShotB NULL.jpg)

The end goal of this project is just to be a still shot, I’m not planning any animation. If I was to add any it would be a simple camera push. I’ve got a VRay sun node lighting the scene which is a nice change due to its simplicity. My last scene was indoors and had many many lights of varying temperatures and types. Below are two of the shots I found on https://ruffledblog.com/ (https://ruffledblog NULL.com/) that I’m basing the scene on. I’m about two thirds of the way done the modeling and when I finish I will make a follow up post. As always if you have any questions don’t be afraid to ask as I love to help others when I can :)
WineCartModelShotE (http://www NULL.terrymatthes NULL.com/wp-content/uploads/2018/01/WineCartModelShotE NULL.jpg)

[Game] Unreal Engine 4 Architectural Rendering WIP 1

UE4 Architectural WIP 1

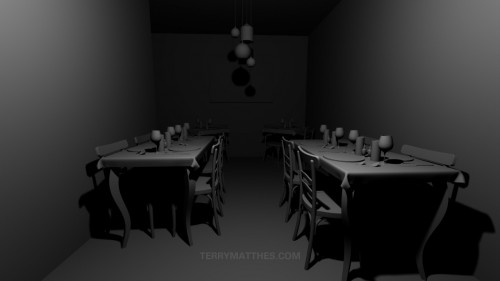
I took a look at the realistic rendering demo (https://www NULL.unrealengine NULL.com/blog/new-release-realistic-rendering-showcase) that Epic Games posted. It has fairly nice soft shadowing and pays close attention to how your eyes behave in light. I think the gap between pre-rendered and real time visuals is staring to get close enough that you could definitely use the Unreal 4 Engine for pre-visualizations and not have to visually take a gigantic hit. In fact you can probably produce more work at a faster pace using UE4. I’m building a small scene to create as realistic a render as I can using the new engine. No holds bared and no excuses. There’s going to be soft shadows, GI, ray traced light going through and off reflective and refractive surfaces plus caustic reflections! That is “literally all the things” when it comes to setting up great looking render. I’m going to be following the “PBR” rendering workflow so if you’ve never taken that challenge up this should be a good intro. There’s also a new PBR rendering contest going on now at Polycount (http://www NULL.polycount NULL.com/2014/06/14/petrolblood/). Here’s another great link to a Poly count forum thread (http://www NULL.polycount NULL.com/forum/showthread NULL.php?t=124683) that deals with PBR in games.

The shot you see here is a preliminary layout done in Maya with nearly all the rough models finished. The wall/ceiling moldings still have to be made. The next step is to take them into ZBrush. There I’m going to sculpt some more detail into some of the pieces and then use the retopology tools to lower the polygon count of each piece.
UE4 Architectural WIP 1 (http://www NULL.terrymatthes NULL.com/wp-content/uploads/2014/06/restaurant NULL.jpg)

[Game] Combat Cross Final

Castlevania Combat Cross

Combat Cross WIP 1 (http://www NULL.terrymatthes NULL.com/wp-content/uploads/2014/04/combatCrossWIP1_001 NULL.jpg)
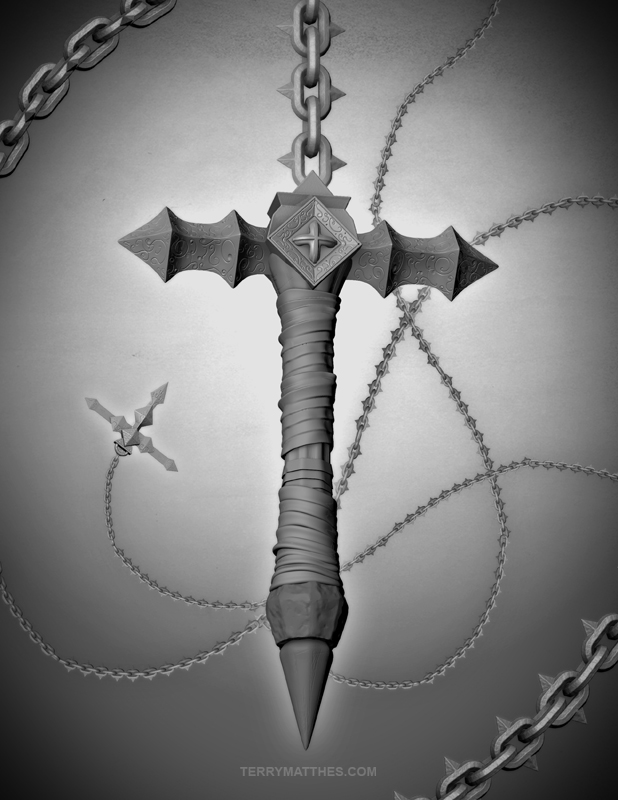
After a bit of a later night I’ve finished my submission for work. Most of the chains are ran along a CV curve, with a few being placed in post. I rendered out each element so that if needed I could rearrange the composition. I tried to keep the rendering fairly simple as I just didn’t have enough time to model and render the cross with proper materials. This limitation almost made it more fun as a project though. Instead of locking down the composition before rendering I could play with it in any way I chose after. This felt like more of an artistic approach which is in with the spirit of the project. I used very simple MIA materials and an ambient occlusion pass when composting everything. The original was rendered at 300 DPI as it was to be printed.

Castlevania Combat Cross (http://www NULL.terrymatthes NULL.com/wp-content/uploads/2014/04/terrancematthes_artsub NULL.jpg)

[Game] Combat Cross WIP 1

Combat Cross WIP 1

I’m a sucker for gothic and macabre games. When the Castlevania: Lords of Shadow 2 came out last month I new I had to play it. Lords of Shadow 2 is a lot of fun in it’s own right, but I really missed the awesome whip animations in the original reboot. Now Dracula uses his own blood as a type of magic whip and the splashy nature of this doesn’t feel as solid as the chain whip in the last game. Work is starting to get busy as we near the end of a project and there has been a company wide call for art submissions. There’s a raffle with prizes to be won based on all the entries they receive. We have just over a week until we have to submit our art and that’s a little less of a heads up than I would like. To make up for the short time I’ve decided to do a prop instead of a scene.

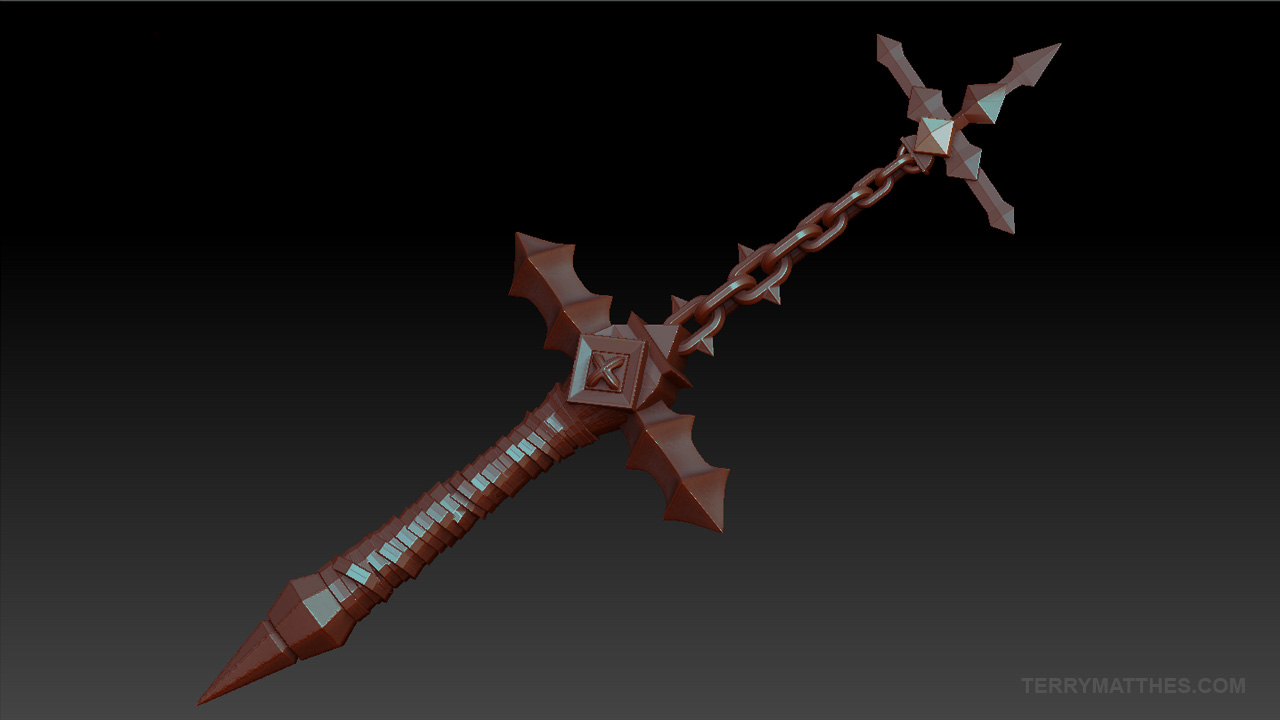
My final submission will be a rendered shot of the Combat Cross laying on a cracked marble floor aged and covered in cob webs. The first step was to model the basic shapes of the cross. For most of this I started with primitives in ZBrush. If a shape was made of multiple primitives I would merge them, create a dynamesh with the new merged tool and then ctrl drag to connect their topology as a single dynamesh. I haven’t decided if I want to do a low poly cage over the entire mesh, or just export the decimated parts into Maya and then group them all. The leather rapped handle was created in Maya by making low res polygon rings and placing them up and down the shaft of the cross. The next step for them will be to smooth them out in ZBrush and using the move tool to make them overlap without penetrating strangely.Combat Cross WIP 1 (http://www NULL.terrymatthes NULL.com/wp-content/uploads/2014/04/combatCrossWIP1_001 NULL.jpg)
I’m not 100% sure, but I think I’ll be chosing to render this with VRay instead of Mental Ray. I know I’m going to want a layered material for the dust over all the surfaces and Mental Ray drops the ball entirely on this. There is a layered shader, but it doesn’t make it all the way through the rendering pipeline unscathed. VRay also seems to be a lot faster in general. I’ll be posting more about the cross this week as the submission is due this Friday (April 11th 2014).

[R&D] nHair Chain Strand Rig Part 2 of 2

This post is a continuation of my last post here (http://www NULL.terrymatthes NULL.com/maya/animation/maya-nhair-chain-strand-rig/). In the first post I explained that I was trying to create a strand of chain that was dynamic, but pinned at both ends like a strand of Christmas garland. At the time I wasn’t able to find any information on how to pin the loose end of the chain to an anchor pertaining to nHair. All tutorials I read/viewed were to do with the legacy hair system whose constraints don’t work on nHair curves. Well I’m here to report that I’ve found the solution I needed.

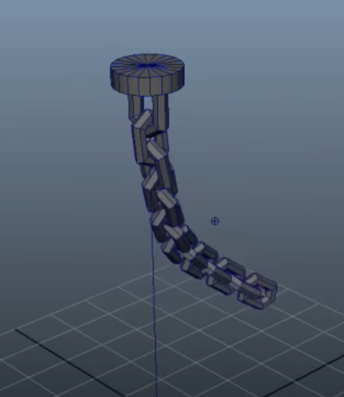
When working with nHair you need to make sure any objects you want it to interact with can also be seen by the nucleus solver. For my purposes this meant turning the polygon object representing my anchor at the end of my chain into a nMesh passive object. Once my polygon anchor was converted it could be used for a “component to component” nConstraint. I constrained the last CV in my dynamic hair curve to a vertex on my polygon anchor. Everything works great now and I can move either end of the rig around and it affects the chain as it should.

Time for bed *yawn*… well maybe a couple episodes of Full Metal Alchemist first. Damn you Netflix!


[R&D] nHair Chain Strand Rig Part 1 of 2

Rigging… It’s not my favorite aspect of 3D, but that’s probably because It’s also my least practiced. What better way to learn though than to jump right into nHair and IK Splines, right :D ? My end goal with this rig is to have several strands of chain that are strewn across a mirror ball attached at several points, think of garland on a Christmas tree if you need a visual. As always to start I researched how this could be accomplished in Maya. Every tutorial I read/watched mentioned IK splines and Maya’s hair system.

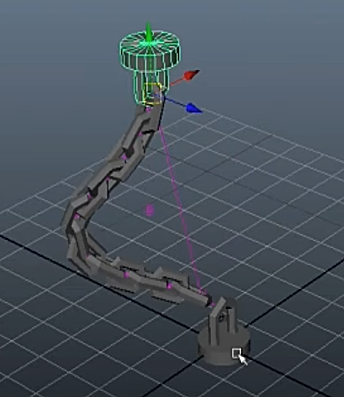
It took me the entire morning, but I was eventually able to produce a chain strand constrained on a single end. The biggest problem I ran into was constraining the far end of the chain to an object. Literally all the tutorials out there are using the old Maya hair System. With the copy of Maya I currently have (2014) you are forced into using Maya’s “nHair” system and the “n” stands for “Nucleus”. Nucleus if you’ve never heard of it is Maya’s new dynamic simulation system that unifies all your dynamic elements so they can operate in conjunction with each other. It’s Very similar to how Side Effect Software’s program Houdini works. So great, “yay”, everything works together, but all the constraints mentioned in the tutorials I watched are based on the old hair system and they do not work with nucleus hair. So this is as far as I have gotten today, and It will probably take another half day to find the proper type of constraint that acts in the same way a “stick” constraint does with legacy hair.

There are plenty of scripts out there that will do this task for you, but I try to avoid scripts when learning. I that find that; (A) it’s essentially letting someone else do the work for you which means you didn’t actually learn anything and (B) depending on how the script works, it could have unintended consequences immediately or down the road. For those of you who have never created anything like this before and are looking for answers here are the steps I used to create the rig and as always don’t be afraid to ask questions :)

  1. Model a chain link and then duplicate it over and over to create whatever length of strand you need.
  2. Use the joint tool to create a joint chain all the way down your strand putting a joint between each place where the pieces of chain meet up.
  3. One by one starting with the top chain link and the top joint use the rigid bind tool to bind each link to its corresponding joint. In the rigid bind options make sure you have the “Bind to: Selected joints” option activated.
  4. Draw an EP curve down the length of the chain adding a point over each of the joints you previously created. Press to “P” key to activate pivot snapping and your points will automatically center on the joints. Rename this curve something like “epc_original”.
  5. Make your curve a dynamic nHair curve through the nDynamics > nHair menu. You need to first make sure that the only option in the “Make Selected Curves Dynamic” option box that is selected is “Attach curves to selected surface”. This will now create a hair system and follicle system in your outliner.
  6. The last step is creating the IK spline and this is where most people make a mistake because they select the wrong curve. In the Animation > Skeleton menu select the option box for the “IK Spline Handle Tool”. Make sure the only option selected is “Root on curve”. With the tool active click in this order… the first joint of your joint chain then the last joint on your joint chain and now open your outliner and hold down ctrl(PC) or cmnd(Mac) and select the curve under the “hairSystem1OutputCurves” node. An IK node should now appear in your outliner.
  7. Lastly select the original curve and parent it to whatever piece of geometry you’d like to constrain the top of the chain to. Now if you use the interactive playback feature and drag that geometry around your chain will follow.

As soon as I figure out how to constrain the other end of the chain with nHair I’ll post an update, and if anyone figures it out before I do then please let me know. Bye for now :)


UPDATE!

Part 2 : The rig gets completed with moveable anchors at both ends. (http://www NULL.terrymatthes NULL.com/maya/animation/nhair-chain-strand-rig-part-2-of-2/)

[R&D] Feeling Winded…

After finishing the fire effect for my project it’s time to move onto the wind portion. To create a tornado the first thing I did was jump into Maya and start setting up emitters in a fluid container. Good lord was that a bad idea. The particle motion to create a tornado consists of a lot more than fire and it’s very hard to control a fluid container with multiple emitters when you don’t know exactly what look you’re going for. After a mornings worth of work I wasn’t where I wanted to be because I still couldn’t identify how my emitters were moving the fluid around. To see anything in real time on my Mac Mini the container settings have to be low. So low that it’s not indicative of the final motion. Not even close. I started to search on the internet and found a good thread on CG Society (http://forums NULL.cgsociety NULL.org/showthread NULL.php?t=1040698) where an artist responsible for clouds and tornadoes in Resistance 3 had made a few posts. I was pointed towards using a regular particle setup to nail the look and then control the fluid container with those particles. Brilliant!

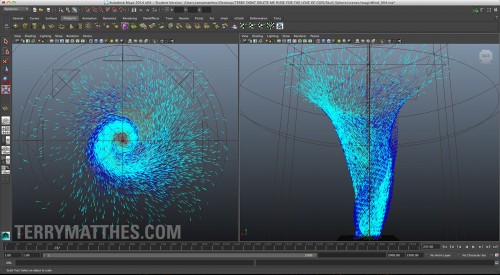
In the afternoon I created my particle tornado. It consists of 5 emitters. One large torus emitter to create the center of the tornado and 4 smaller cylindrical volume emitters placed around the base to simulate the upward streams of air you get that contribute to the storm. Beyond the 5 emitters there are a total of 4 force fields that create the motion. The first force field is a uniform field that pushes the particles straight up. This is similar if not the same as a gravity field with a +Y force. The second field is a cylindrical vortex volume. This volume spins the particles while keeping them in a cohesive shaft. The third field is a cylindrical axis volume field. This is what makes the tornado spread outward from top to bottom. I’ve set it’s “around axis” attribute to X0 Y1 Z0. This tells the particles to spin around the Y axis. The attenuation value on this field is set higher so that the particles don’t instantly push out to the edge of the volume.

Attenuation acts like an ease in and out of the volume. If you set the attenuation value to zero on any field the particles will take on the motion of the volume as soon as they enter it’s space and this can create abrupt changes in direction. The final volume is a spherical volume axis field that has been squashed and placed atop the cone to push the particles outward. I’m using the “away from axis” set to X0 Y1 Z0 to achieve this.

For the first hour or so I really struggled to get the particles to follow a nice swirling motion and then I discovered my mistake. I have to set the particle’s (not the emitter’s) “conserve” value to 0. This stopped the particles from inheriting any initial motion and gave the force fields full control. If you don’t do this it’s an uphill battle to control their initial momentum. Now that I have my particle system down the next step is to create a fluid container that these emitters will be parented to. I’ve been told that since Maya 2011 particles and nParticles have been able to emit voxel data into a fluid container. Well see how well that goes…

terryTornado (http://www NULL.terrymatthes NULL.com/wp-content/uploads/2013/12/terryTornado NULL.jpg)

UPDATE

I got my particles emitting voxel data to the fluid container in Maya. I forgot to turn buoyancy off of the fluid container so the particles keep going up past the top of the funnel, but I’ll fix that on my next go. The fluid container is using the density information to shade the particles.