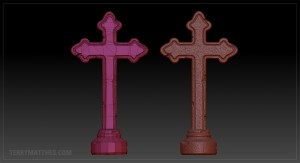
 (http://www NULL.terrymatthes NULL.com/wp-content/uploads/2012/11/tombstone_wip NULL.jpg)Over the past few years I have really started to feel dependent on Maya as my 3D application of choice. It’s an amazing piece of software, but when it comes to creating game assets ZBrush eventually came impossible to ignore. This is my first attempt and producing a game asset from start to finish in ZBrush. To help me get started I sat down with a friend of mine who is a character artist by trade and spends a lot of his time in Zbrush. After learning about some really important concepts such as Poly Groups and using Zspheres for retopology I was on my way. The low poly on the left clocks in at ~1K polys which is what my target was. The original on the right was about 4 mil, but that doesn’t really matter because we are only using it for baking our texture maps. The next step for me is to UV map the low poly version and then it’s off to xNormal (http://www NULL.xnormal NULL.net/1 NULL.aspx) for transferring the details from the high to the low.
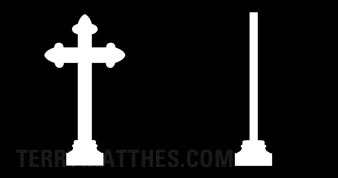
The stub mesh I started with was created in Zbrush using Shadowbox and the black and white texture below. I looked at my concept art and created a Z axis portrait and a X axis portrait of the tombstone for the Shadowbox alpha. I really like this work flow as it’s incredibly fast and can save you a lot of time when it comes to creating your base to sculpt on. The cuts in the rock surface were made with the clip curve brush and then I used the Trim Dynamic brush to flatten out the sharp edges. The rocky noise was made using Surface Noise and then repeating the process after masking off certain portions of the mesh using the Mask by Cavity function. (http://www NULL.terrymatthes NULL.com/wp-content/uploads/2012/11/grave_D NULL.jpg) One thing I found useful was the ability to save out noise profiles for later use. I have about six tombstone to make so not having to toy with the noise curves for each one will save me a lot of time. The last step was to go in by hand and carve in individual cracks with the Dam Standard brush. This mesh is going to be used in a scene I’m creating for the UDK. I’m really excited to attack this mesh with poly paint after it has UVs as I recently watched a great video (http://www NULL.cgnuggets NULL.com/collections/frontpage/products/september-2011-video-polypainting) on the subject by Jesse Sandifer. More to come soon :)
Comments (0)